
To access help on a particular subject, just click on the corresponding blue bar.
How To Attach A File In Gmail
Attaching a file to an email in Gmail is very easy. Just follow these steps:
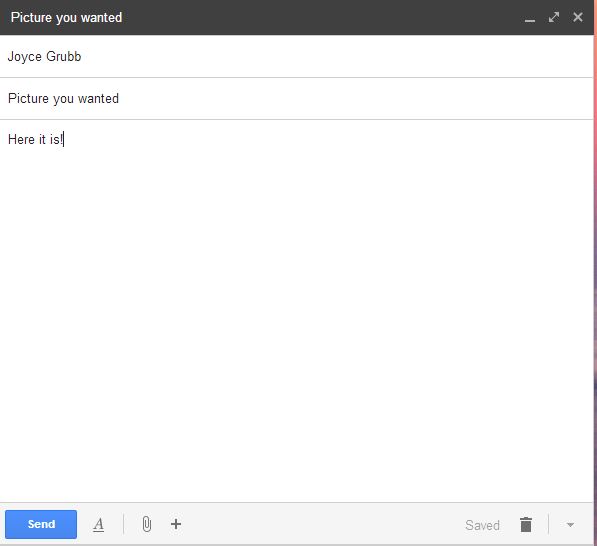
- First, create an e-mail just as you always do. Fill in the address(es) of your recipient(s), your subject and write your message.
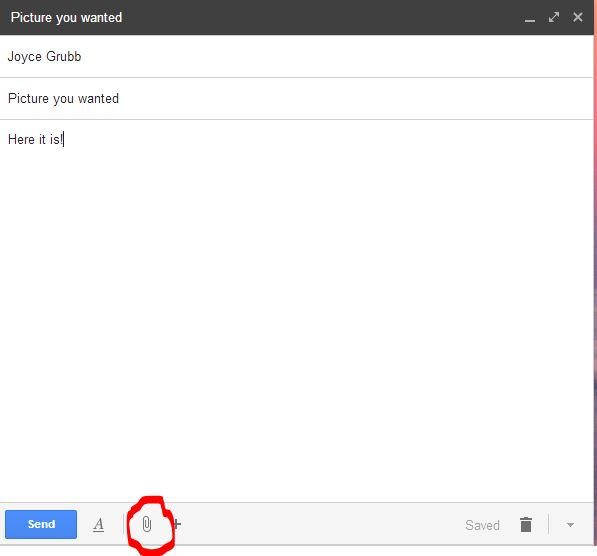
2. Next, click on ATTACH A FILE. (Paperclip icon)
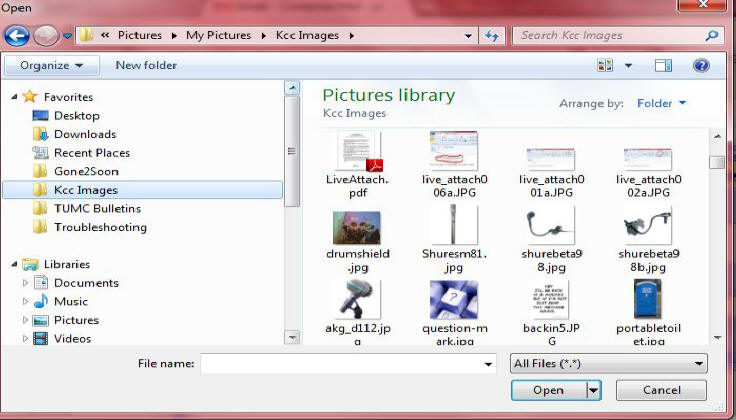
3. A new window appears. You will need to navigate to the file you want to attach. The top bar shows you your current location. You can use the left column items to find your file.
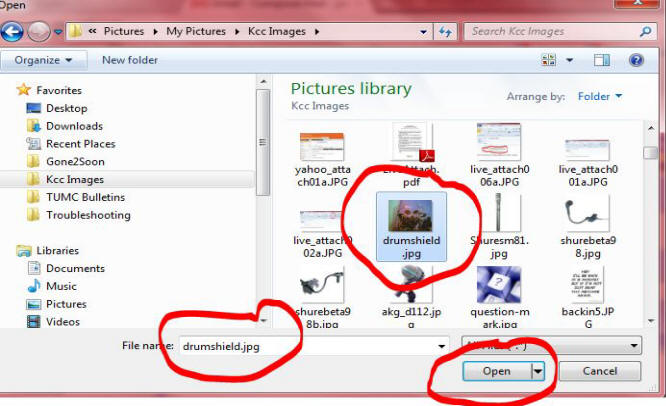
4. Once you find the file you want to attach, click on it once (highlighting it). Its name will appear below and you can then click Open.
5. Your email will now appear showing the attached file name and size of the file.
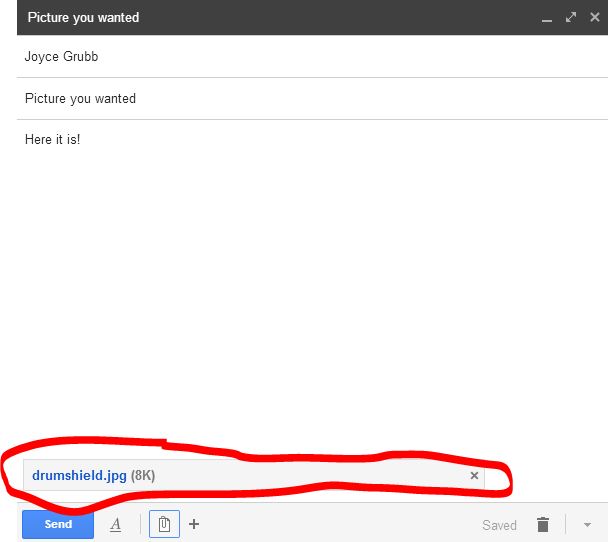
6. If you made a mistake and attached the wrong file or if it’s too large to send via email, you can remove the attachment by clicking on the X to the right of the file name. On the other hand, if everything is correct, just click SEND.
How To Invoke BCC: in Gmail
We can’t emphasize enough the importance of using the BCC: (Blind Carbon Copy) feature of an email program when sending an email to a collection of people who do not know each other. (To read more about why this is important and how to use BCC:, click here.)
Sometimes, though, people can’t find the BCC: field. If you’re a Gmail user and don’t see a BCC: field when you start a new email, here’s how to force the appearance of the BCC: field.
1) Start a new email. (Compose)
2) Only the TO: field will be showing. Notice the “BCC” link directly to the right of the TO: field.
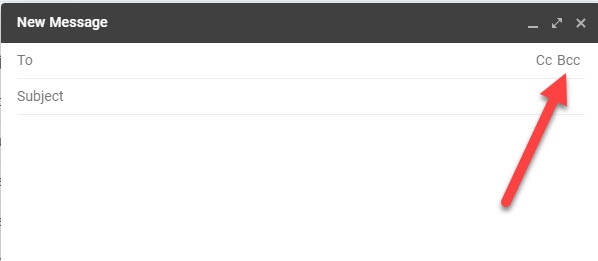
3) Click on the “BCC” link.
4) The BCC: field now appears in your new email. Unfortunately, you will need to invoke the BCC: field in subsequent new emails as Gmail doesn’t remember your setting.
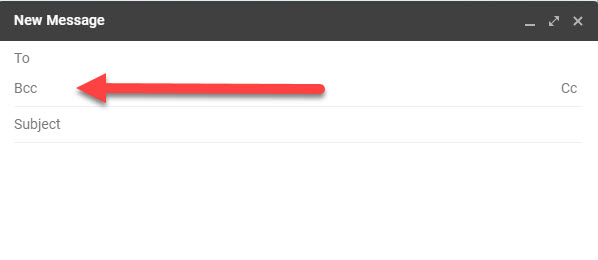
5) Put the email addresses into the BCC: field. Send your email as usual.
Want to print out just the instructions on this page? Click HERE.
Color Code Labels In Gmail
We’re always looking for ways to organize on the computer, especially emails. Although Gmail doesn’t have the same robust color abilities we find in Microsoft Outlook, it is possible to add color to the labels we create. Here’s how you can do that:
If you already have a label created…
- Make sure you are looking at the emails in your Inbox.
- Hover your mouse over one of your labels listed in the left column.
- Notice the three vertical dots.
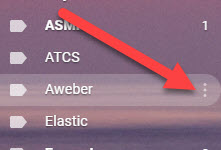
4. Click the dots.
5. From the menu which appears, choose Label Color.
6. Choose a color.
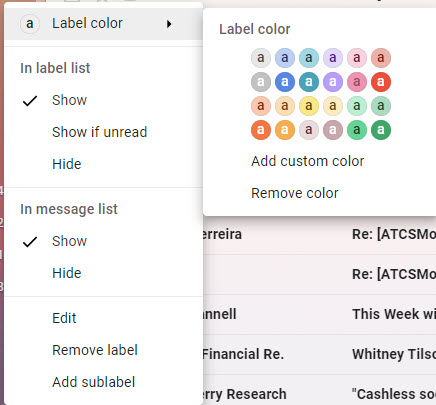
The label will now be the color you’ve chosen.
If you are creating a new label…
- Click on the Label icon in the top menu.
2. From the menu which appears, choose “Create New.”
3. Give your new label a name. This name should be as brief as possible.
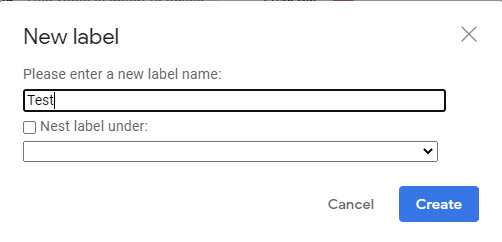
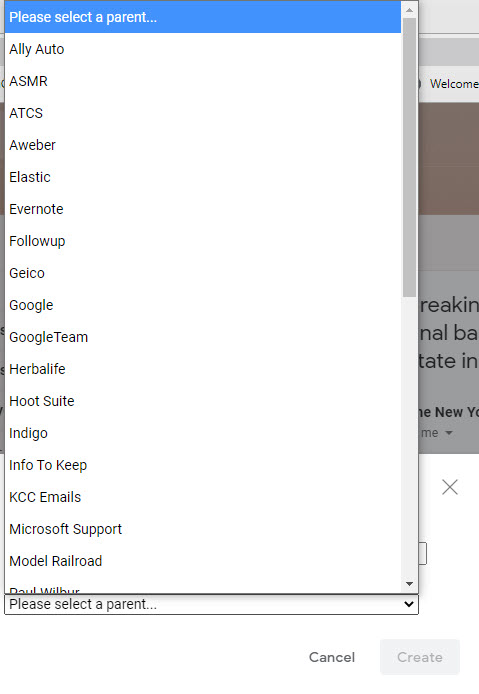
4. If you want to make your label a sub-label (nested under another label), put a check mark in “Nest label under:” and click the drop-down menu so you can choose the label.
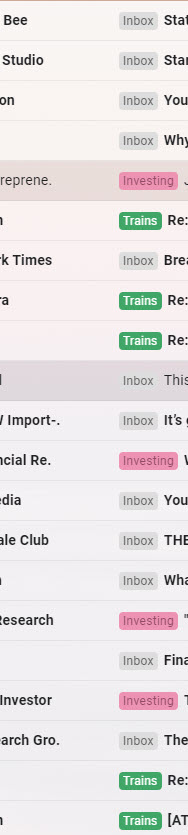
Here’s an example of what this might look like when you’ve finished setting up your label colors:
Now, to have your label in color, follow the steps above under “If you have already have a label created.