iPhone iOS 16 Sleep Settings can be a little tricky. With that in mind, let’s see if I can clear it up for you. (Fear not, Android users! I’ll be posting a “How To” for your phones, also.)
Why Use Sleep Settings?
Some people shut off their smartphones at night because they don’t want to be disturbed. On the surface, that sounds like a terrific idea. A good night’s sleep is good for everyone! Still, with an aging population, it might be a handicap if a person can’t get through to you should there be an emergency.
Using the sleep settings properly is a nice balance. When there are no emergencies, one can get his or her much-needed rest. Yet, if there is something that needs immediate attention, that can happen, too.
iPhone iOS 16 Sleep Settings
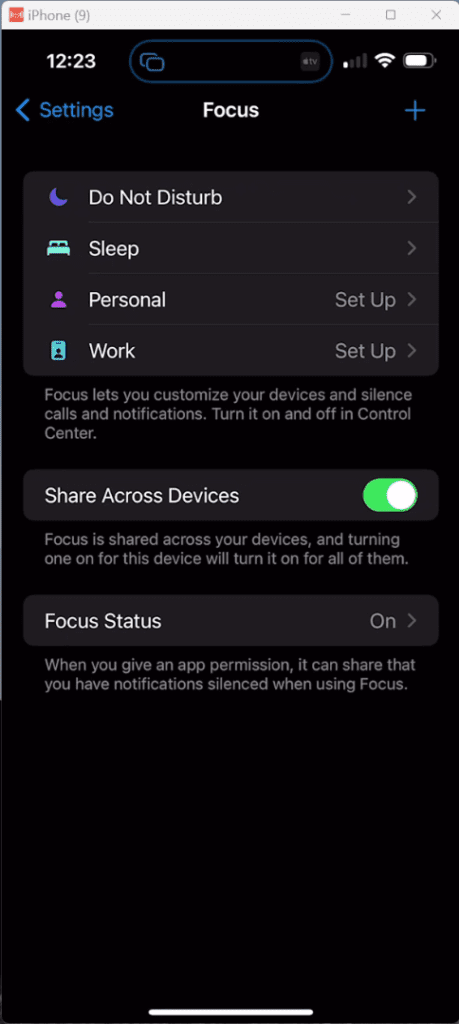
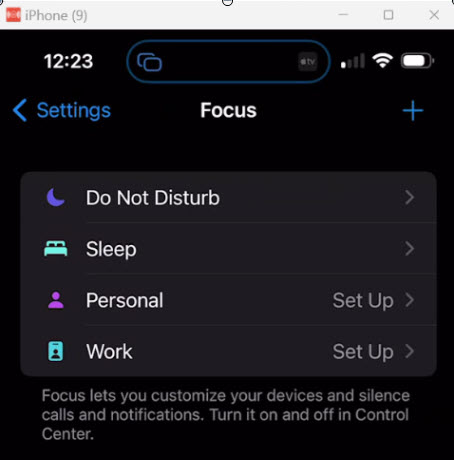
First, open Settings on your phone. Next, scroll down until you find “Focus” and then open that option. At the top, you’ll see something like this:
At first glance, you might think you should open “Do Not Disturb.” However, in this case, we want to control what happens when we’re trying to get some shut-eye. For that purpose, we’ll tap “Sleep.” That will bring us to this screen:
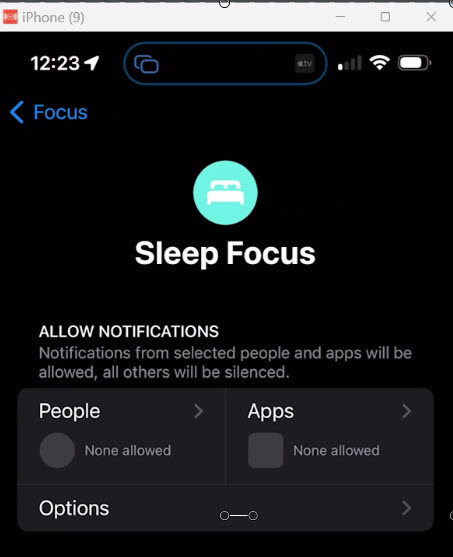
Notice the sentence under “Allow Notifications.” It reads, “Notifications from selected people will be allowed, all others will be silenced.” Below that statement, you can see there are two areas we can adjust, “People” and “Apps.”
People
When you’re on the screen above, tap “People” and the following screen will appear:
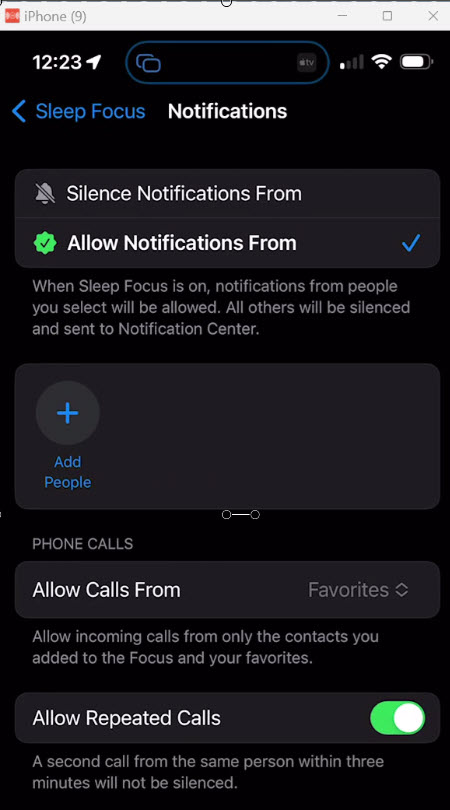
Although it’s a bit difficult to distinguish, this window is actually divided into two sections. The area above the line that reads “Phone Calls” covers just notifications. You’ll get no notifications from anyone unless you click on the “Add People” plus sign. As you can see from my phone, I have all notifications off from people.
The second half of the screen has to do with Phone Calls. You can set what phone calls to allow by tapping on the right side of the line. You’ll get a pop-up window like this:
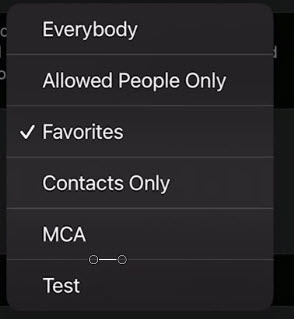
As you can see, I have selected “Favorites.” Using this setting, I can even allow text messages through if I’ve added a person’s text number to my Favorite list. I can also allow “Everybody” – why use sleep if you’re going to allow everyone? Or, Contacts Only or Allowed People Only. Not to confuse you, the options “MCA” and “Test” are contact lists I made up on my phone and you will not see them on yours.
One other setting you should note: you have the option of allowing or not allowing phone calls to go through if the same person calls twice within a three-minute period.
Apps
Going back to the Sleep Focus window, tap on “Apps.”

If you want to allow certain apps to contact you during sleep, this would be the place to add them. Example? You might want to allow calls from WhatsApp or perhaps Messenger. Currently, I don’t allow any apps but there might be times I would want to add an app or two.
iPhone iOS 16 Sleep Settings – Time
While there are a few other settings you can make for Sleep Mode, the final one I’m going to cover in this post is time. When would you like Sleep Mode to start and stop? For that, you need to go somewhere else on your iPhone. At this point, close all the windows you have open regarding Sleep and Focus. Next, find the Health app and open it up. (If you can’t easily locate the app, simply use the iPhone’s search option and search “Health” and the app will appear.)
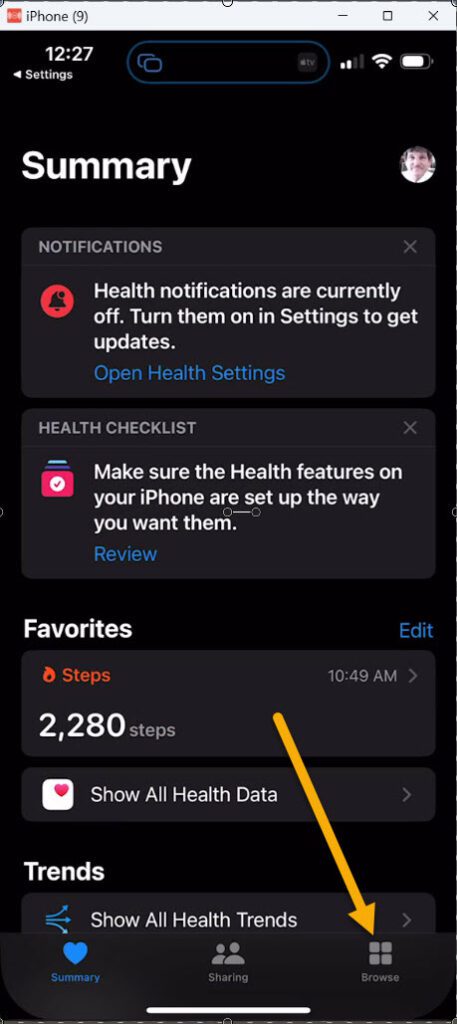
When you get into the Health app, if you’ve never been there before, you will need to walk through a wizard to get things set up. This post isn’t going to cover those steps so, if you have problems, let me know in the comments below. Once you get through the wizard or if you’ve already set up the Health app, you will see a screen similar to the one directly below. Notice at the bottom right the “Browse” button. (I’ve drawn an arrow indicating where it is.)
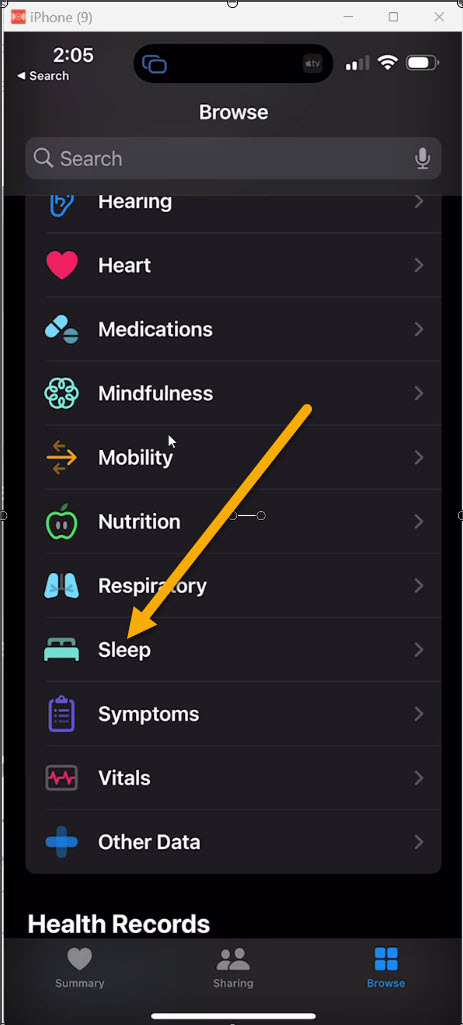
When you activate the browse function, you’ll get the following window. Scroll down and find “Sleep.”
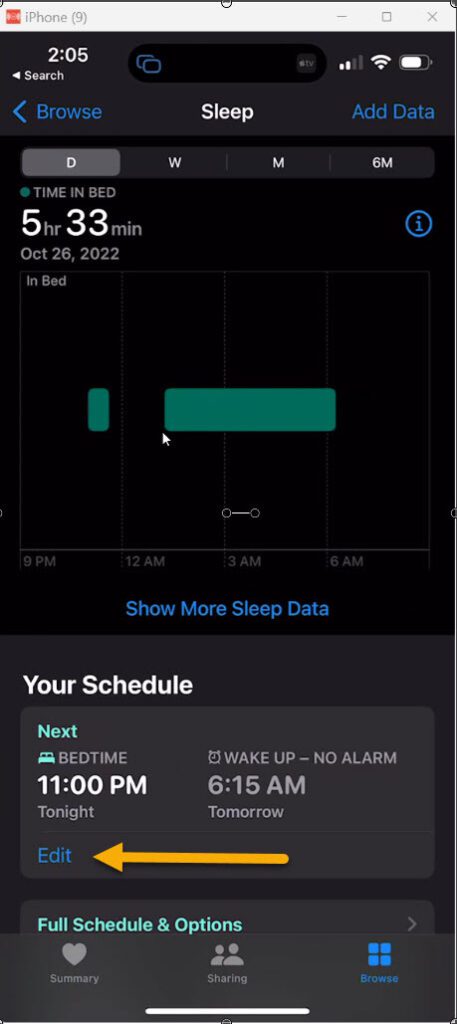
Tap on Sleep. When the next window appears, find “Your Schedule” and tap the “Edit” field. (You will need to initially set up a schedule if you’ve never done it before.)
Now, simply set your start and stop times!
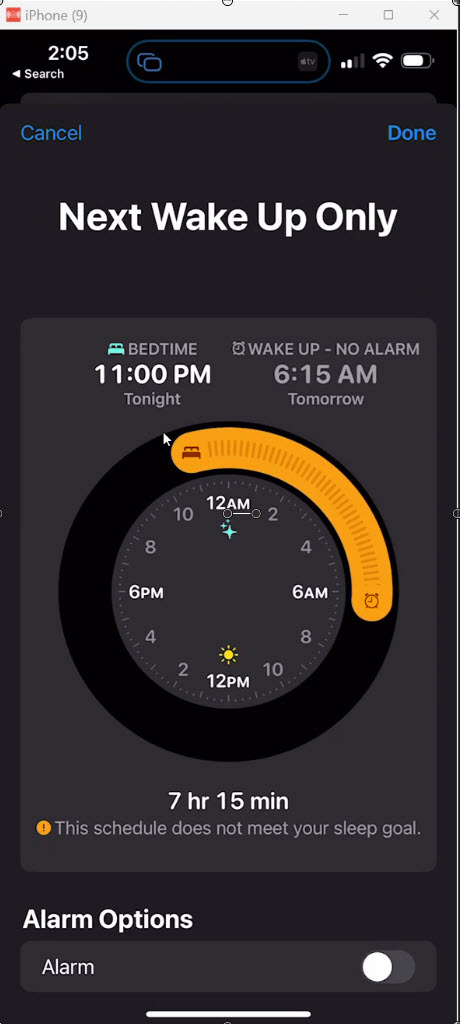
Once you’ve set the times, tap “Done.” The Health app may ask you to set up notifications. Whether you do that or not is up to you. If you also use an Apple iWatch, you may be asked to select options there, too. Otherwise, you’re good to go!

Thanks, Bro, appreciate your help on this. What does the Bible say, A brother is born to assist or help…