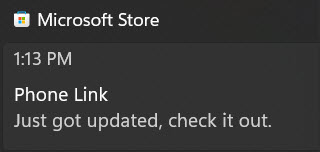
This post is about Windows notifications – Part 1! When you’re working on a Windows 10 or 11 computer, you will often see notifications on the right side of the taskbar. These notices can be helpful but they can also be annoying at times. In this post, I’m going to show you the various ways you can control the notifications.
Notifications – On or Off
Whether you’re using Win 10 or 11, the first thing you can control is to turning notifications either on or off. Here’s how you can do that:
Windows 10
- 1) On the Start Menu, choose Settings (the cogged icon directly above the Power icon.)
- 2) In the “Find a setting” field, type “Notifications” – without the quotes.
- 3) From the search results, choose “Turn app notifcations on or off.”
- 4) On the right side of the window, slide the “Get notifications from apps and other senders” switch to off.
- 5) Notice that there will probably be three checkmarks still turned on. Read those options and remove the checkmarks for anything you don’t want to be notified about.
Windows 11
- 1) On the Start Menu, choose Settings (the cogged icon labeled “Settings.”)
- 2) In the “Find a setting” field, type “Notifications” – without the quotes.
- 3) From the search results, choose “Notifications & actions.”
- 4) At the top of the right column of the window, slide the “Get notifications from apps and other senders” switch to off.
- 5) Scroll down to “Additional settings” and expand the list by clicking on the down arrow to the right.
- 6) Notice that there will probably be two checkmarks still turned on. Read those options and remove the checkmarks for anything you don’t want to be notified about.
Do Not Disturb
Rather than turn notifications completely off, you can simply enter the “Do Not Disturb” mode. In both Win 10 and 11, this is called “Focus.” Here’s how to activate this and what all you can do.
Windows 10
- 1) On the Start Menu, choose Settings (the cogged icon directly above the Power icon.)
- 2) In the “Find a setting” field, type “Focus” – without the quotes.
- 3) From the search results that appear, choose “Focus assist.”
- 4) On the right side of the window, choose either “Priority only” or “Alarms only.”
- 5) If you choose “Priority only” click on “Customize your priority list.”
- 6) In the “Customize” list you will see various categories. Under People, you can add contacts and under Apps you can add apps. These are the people or apps who can interrupt your focus session.
- 7) While you’re on the “Focus assist,” you can also set some “Automatic rules.”
- 8) Note that if you turn on “During these times,” you can click on those words and set your own times. You can also change the focus level.
- Finally, you can put a checkmark in “Show me a summary of what I missed while focus assist was on.”
Windows 11
- 1) On the Start Menu, choose Settings (the cogged icon labeled “Settings.”)
- 2) In the “Find a setting” field, type “Focus” – without the quotes.
- 3) From the search results that appear, choose “Focus settings.”
- 4) On the right side of the window, click the down arrow to the right of “Focus.”
- 5) From the options, you can choose a session duration. It generally defaults to 30 minutes but you can change that by using the plus and minus signs.
- 6) Below the session time, you can remove the checkmarks for the things you don’t want to have happen.
Just Do Not Disturb
In Windows 11, you can just turn on “Do not disturb.” When you do, notifications will be sent to the notification center instead of popping up on the taskbar. At the bottom of the”Focus” options, click on the “Related settings – Notifications. At the top of the page just turn on the “Do not disturb” switch.
Notifications – Just Move Them
Suppose you don’t want to turn off notifications but, rather, you just want them someplace other than the right side of the taskbar. Microsoft doesn’t actually allow you to move notifications. However, you can make it happen with an app called TopNotify. This app works in both Windows 10 and 11. I created a video showing you how to use it. Just click on the image below to view on YouTube.

Windows Notifications – The Things You Can Do – Part 1 Conclusion
This is part 1 of a 2-part blog post on Notifications in Windows 10 and 11. Be sure to watch for the next post in a few days.
